前言
Let’s Encrypt 是一個證書頒發機構,它提供與當前付費證書一樣安全的免費 SSL 證書。在本指南中,我們將為 Ubuntu 18.04 上的 Apache 配置 SSL 證書。
Let’s Encrypt 是一個於 2015 年三季度推出的數位憑證認證機構,旨在以自動化流程消除手動建立和安裝憑證的複雜流程,並推廣使全球資訊網伺服器的加密連接無所不在,為安全網站提供免費的傳輸層安全性協定(TLS)憑證。(維基百科)
預先準備
1. 安裝 Let’s Encrypt 客戶端(Certbot)
讓我們首先更新軟件包並安裝 software-properties-common。
$ sudo apt-get update && sudo apt-get install software-properties-common
現在添加存儲庫(Repository): Universe 和 certbot。
$ sudo add-apt-repository universe && sudo add-apt-repository ppa:certbot/certbot
如果出現提示,請按 Enter。
再次更新軟件包列表並為 Apache 安裝 certbot。這是 Let’s Encrypt 客戶端。
$ sudo apt-get update && sudo apt-get install certbot python-certbot-apache
如果出現提示,按 y 和 ENTER。
2. 取得 SSL 憑證(Certificate)
我們現在將為我們的測試網域 test1.ui-code.com 獲取證書。 Certbot 有一個 Apache 插件,可以自動安裝證書。
$ sudo certbot --apache
Enter email address (used for urgent renewal and security notices) (Enter 'c' to
cancel):
輸入一個電子郵件地址,可在緊急續訂和安全通知的情況下與你聯繫。
Please read the Terms of Service at
https://letsencrypt.org/documents/LE-SA-v1.2-November-15-2017.pdf. You must
agree in order to register with the ACME server at
https://acme-v02.api.letsencrypt.org/directory
- - - - - - - - - - - - - - - - - - - - - - - - - - - - - - - - - - - - - - - -
(A)gree/(C)ancel:
按 a 和 ENTER 同意服務條款。
Would you be willing to share your email address with the Electronic Frontier
Foundation, a founding partner of the Let's Encrypt project and the non-profit
organization that develops Certbot? We'd like to send you email about our work
encrypting the web, EFF news, campaigns, and ways to support digital freedom.
- - - - - - - - - - - - - - - - - - - - - - - - - - - - - - - - - - - - - - - -
(Y)es/(N)o:
按 n 和 ENTER 不與 Electronic Frontier Foundation 分享你的電子郵件地址。
Which names would you like to activate HTTPS for?
- - - - - - - - - - - - - - - - - - - - - - - - - - - - - - - - - - - - - - - -
1: test1.ui-code.com
2: www.test1.ui-code.com
3: test2.ui-code.com
4: www.test2.ui-code.com
- - - - - - - - - - - - - - - - - - - - - - - - - - - - - - - - - - - - - - - -
Select the appropriate numbers separated by commas and/or spaces, or leave input
blank to select all options shown (Enter 'c' to cancel):
如果你的伺服器上已經配置了多個網域,擬將在此處看到這些網域的列表。
如果您不想使用前綴 www 在你的網站地址中,請選擇選項 1。否則選擇選項 2。
Obtaining a new certificate
Performing the following challenges:
http-01 challenge for test1.ui-code.com
Waiting for verification...
Cleaning up challenges
Created an SSL vhost at /etc/apache2/sites-available/test1.ui-code.com-le-ssl.conf
Enabled Apache socache_shmcb module
Enabled Apache ssl module
Deploying Certificate to VirtualHost /etc/apache2/sites-available/test1.ui-code.com-le-ssl.conf
Enabling available site: /etc/apache2/sites-available/test1.ui-code.com-le-ssl.conf
Please choose whether or not to redirect HTTP traffic to HTTPS, removing HTTP access.
- - - - - - - - - - - - - - - - - - - - - - - - - - - - - - - - - - - - - - - -
1: No redirect - Make no further changes to the webserver configuration.
2: Redirect - Make all requests redirect to secure HTTPS access. Choose this for
new sites, or if you're confident your site works on HTTPS. You can undo this
change by editing your web server's configuration.
- - - - - - - - - - - - - - - - - - - - - - - - - - - - - - - - - - - - - - - -
Select the appropriate number [1-2] then [enter] (press 'c' to cancel):
按 2 和 ENTER 將所有流量重導向到 HTTPS。
Redirecting vhost in /etc/apache2/sites-enabled/test1.ui-code.com.conf to ssl vhost in /etc/apache2/sites-available
/test1.ui-code.com-le-ssl.conf
- - - - - - - - - - - - - - - - - - - - - - - - - - - - - - - - - - - - - - - -
Congratulations! You have successfully enabled https://test1.ui-code.com
You should test your configuration at:
https://www.ssllabs.com/ssltest/analyze.html?d=test1.ui-code.com
- - - - - - - - - - - - - - - - - - - - - - - - - - - - - - - - - - - - - - - -
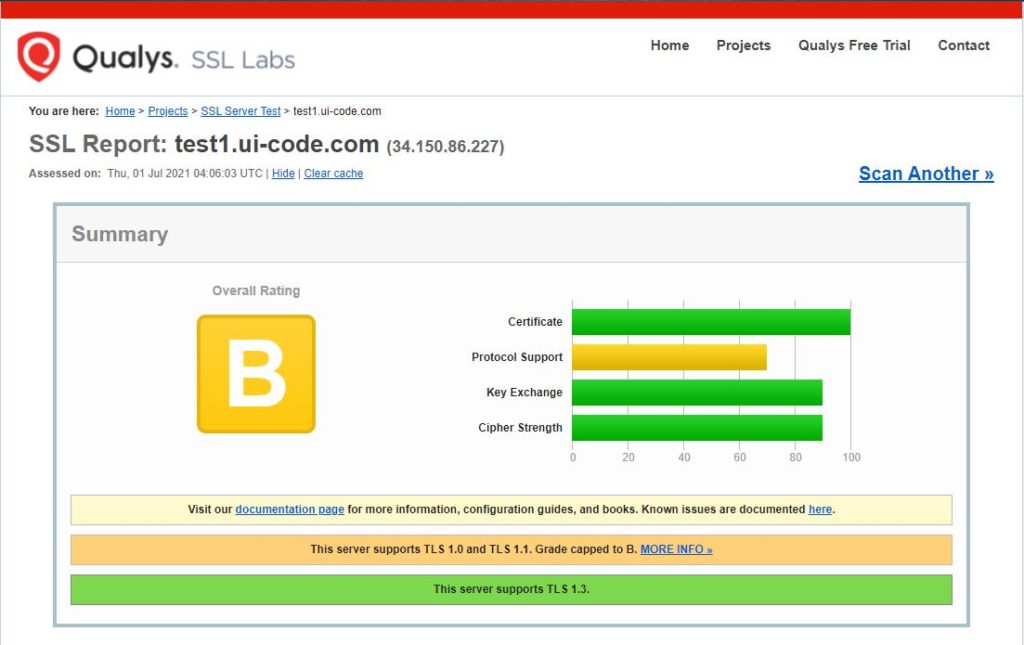
3. 測試 SSL
您現在可以到 https://www.ssllabs.com/ssltest/ 並測試你的網域。

4. 自動續訂(Auto Renewal)
由於 Let’s Encrypt 憑證在 90 天後到期,因此需要定期檢查它們是否續訂。 Certbot 將每天自動運行兩次,並更新任何在 30 天內到期的證書。
$ sudo certbot renew --dry-run
相關文章
- [教學][Ubuntu 架站] 如何在 Google Cloud Platform 架設 Ubuntu 伺服器
- [教學][Ubuntu 架站] 安裝 Apache 網頁伺服器,並架設多個網站(多網域)
- [教學][Ubuntu 架站] 在 Ubuntu 18.04/19.10 上安裝 MySQL Server
- [教學][Ubuntu 架站] 在 Ubuntu 18.04/19.10 伺服器上安裝 PHP
- [教學][Ubuntu 架站] 在 Ubuntu 18.04 / 19.10 上安裝 phpMyAdmin
- [教學][Ubuntu 架站] 為 Ubuntu 18.04 / 19.10 上的 Apache 配置 Let’s Encrypt SSL 憑證